Showing posts with label crafts. Show all posts

Monday, October 19, 2015

DIY Doll Furniture: American Girl Doll Adventures

You can tell when I'm truly desperate for entertainment if I turn to crafts.  With winter coming, crafts will be an ever more frequent occurrence, hopefully accompanied by quiet, cleanliness, and things we can actually use.

I have an American Girl Doll...girl.  She is 11 and adores dolls.  Being 11 means she is also capable of managing a craft of her own choosing without making a ginormous mess.  I have been waiting for this day to come...

She was perusing the internet for all things American Girl, and came across a couple of websites and YouTube channels.  The YouTube videos show gigantic handmade, ceiling to floor and wall to wall doll houses, with 10+ rooms and full of furniture that the dolls can stand in and actually use.  It was seriously impressive.

Here are a couple of those videos.


I'm left to wonder, why oh why didn't I think of this???

The DIY website she found is called "American Girl Ideas" and you can find it here at americangirlideas.com.

The project she picked, after HOURS of debate, was "Julie's Table & Chairs".  Julie is the doll from 1974, so her furniture reflects that time period.

The list of supplies is longish, but you probably have most of the items on hand, which is a large factor in whether or not we do crafts around here.

Everything can be cut with scissors, and this is another big bonus.

This is our mid-project photo, the table is assembled, and the chair and base still needed to be glued together.  We chose two spray paint colors we had on hand, and blessedly Girl #3 was please with this option.  $ saved.


The finished product was darling, and the dolls could actually sit, albeit not very comfortably.  As AGD's knees don't bend, this makes sitting awkward.

The hot glue lasted about two days on the chairs with the torque the dolls place on the joint as they sit.  I'm not sure how to fix this without melting the chair plastic.  I also would like to figure out a heavier base for the chair than the 2.5" steel washer that we glued under the round base.

Photo Cred: Girl #3

She also made the "Hot Lunch" food set from the printable she found on the same website, because obviously there must be something on the table when dolls sit down at it.  Without a color printer it was a little lack-luster but she was thrilled, which is all I ask for.  Cutest video ever, it's long, but it's her perspective. 


All in all it was successful, my daughter was proud of her accomplishment and played for hours with the set.  I was probably a little more involved in the process than I needed to be, but my inner perfectionist wouldn't let go.  Girl #3 is totally capable of spraying furniture, although my trust in her ability to NOT spray the porch was low.

Have fun with your kids and let them be in charge sometimes!

Tuesday, April 7, 2015

Leftover Peeps, anyone? Craft with Kids

Peeps coming out my ears!  Is this your typical post-Easter experience? Watching as the opened package-minus-one slowly hardens into concrete blobs, since I don't know anyone who can eat more than one Peep in a sitting.  I might be in the minority, as I happened upon #wheremypeepsat and found a million-and-one darling ideas to do with Peeps, by people who actually buy them for the purpose of eating.  I think.

I finally tried this fun and simple idea to use my leftover Peeps for a spring craft activity. 

I started with Peeps, chocolate candy that looks like eggs, butter, pretzels, marshmallows, coconut, crispy rice cereal, and green food coloring.  Notice the store-brand options. Save $. 
(Laugh at my photo.  It's okay.  Yes those are my shoes and apron.  Call the blurriness my filter.)


Add a few drops of green food coloring to your coconut.  This will be grass for the nests.  Mine is  only slightly green, but go ahead and make yours brilliant!


Mix up a batch of Rice Krispy Treats.  Your marshmallows should have  a recipe on the bag.
It's reeeaaalllly hard.

2 Tbsp butter (real, please)
1 pkg large marshmallows
6 cups crispy rice

Melt the butter over low, then add marshmallows and melt over low.  Pour over rice cereal.
Sometimes I get over-anxious and pressed for time and I speed-melt my butter (browned) & marshmallows (browned).  This makes for a hard and dry finished product.  Slow down, woman.

To make nests press a small handful of warm mixture into muffin tins, leaving a well in the center.


The rest is kid-friendly fun and creativity!  Make a small pile of supplies on a paper towel for each child (to avoid the spread of germs) and let them have at it!

We did this on our family ski trip to Grand Targhee.  It was crazy fun!


The sheer concentration, engineering, & interpretive design made me smile in wonder!  
Kids are so amazing!


The finished products were as varied as the artists themselves.


And believe it or not, most of the Peeps are gone!  We did microwave a few.  
If you haven't done that yet, you should.  Think of it as a science experiment.  


What?! Science AND crafts in one day?! It's an Easter miracle!

Monday, March 23, 2015

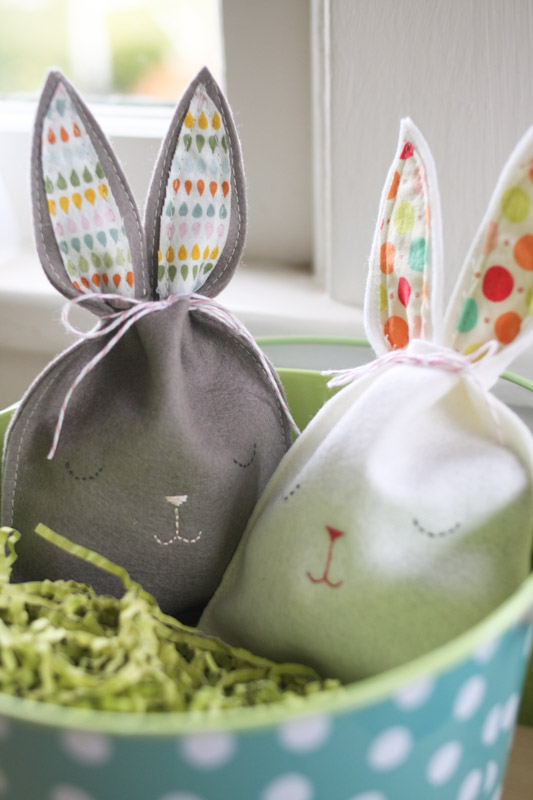
Fabric Bunny Gift Bags Tutorial


It's finally here! The darling bunny gift bag tutorial from my 12 Simple Easter Crafts post found here.  I whipped out 4 in about an hour, and this process would only get faster the more you make.  A veritable factory production line of bunnies.

You will need:

  • 1/4 yard each of 4 different cotton fabrics.  Mixed colors and patterns are cutest.
  • 12" yard, ribbon, or string for each bag.  The above amount of fabric will make around 8 bunnies.
  • 1/4 yard iron-on interfacing.
  • sewing machine, thread, seam ripper, scissors, iron, pins.
  • sew using a 1/4" seam allowance.
Here is the pdf pattern I created.  My first, so be kind ;).  It should print full page, and the body should be roughly 4"w x 4.5"h.  

Cut out all your pieces.  I used all four fabrics to make one bunny, alternating which was the body, lining, front of ear, and back of ears.  Iron interfacing to the all the front ear pieces.


Sew the front and back of the ear, right sides together.  Leave the bottom open for turning.


Clip the round edge of the ear seam allowance so when you turn them, they lay flat.  


Turn the ears right-side-out, and iron them.


Sew the outer bag pieces right sides together.
Sew the lining pieces right sides together, leaving a 1.5" gap in the bottom to turn the bag.


 Pin the ears to the right side of the outside of the bag, so the ears slant away from each other, and touch in the middle.


Then slide the lining over the pinned outer & ears, so the lining and the outer are right sides together.


Sew around the top of the bag 1/4" away from the edge.
Turn the bag right-side-out through the hole in the lining.


Tuck the lining into the outer bag body.


Top stitch around the bag 1/2" from the edge.  
This will be the casing for your 12" of yarn, string, or ribbon.


Completed top stitching.


Clip the stitches on the left side of the bag between the top-stitching and the top edge of the bag.  This will the be opening for your yarn to go through.


Tie a knot in the end of your yarn, and stab a safety pin through it.  Then thread it through the opening, around the casing and out again.


Ready to tie!


Fill it with candy and share!


Thinking aloud, in front of the girls, I said I should make one for each of the cousins for Easter...
that would be 33.
I need to stop saying crazy things aloud.  Or just get started earlier.


I just love giving handmade gifts.  It's the little extra effort that makes it so much more special.

Have you started Easter dresses yet?  I've got the final decision from the girls, they know what they want.  Now I just have to get moving and buy about 50 yards of tulle.  I love spring dresses, but man, they're a lot of work!

Happy crafting!

Sunday, March 15, 2015

Spring Vegetable Stamps Craft


We are always looking for cute, simple, & fun crafts.  Sometimes crafting can be so darn expensive, leaving me in shell-shock after a trip to the craft store.  I thought DIY was supposed to save money!  

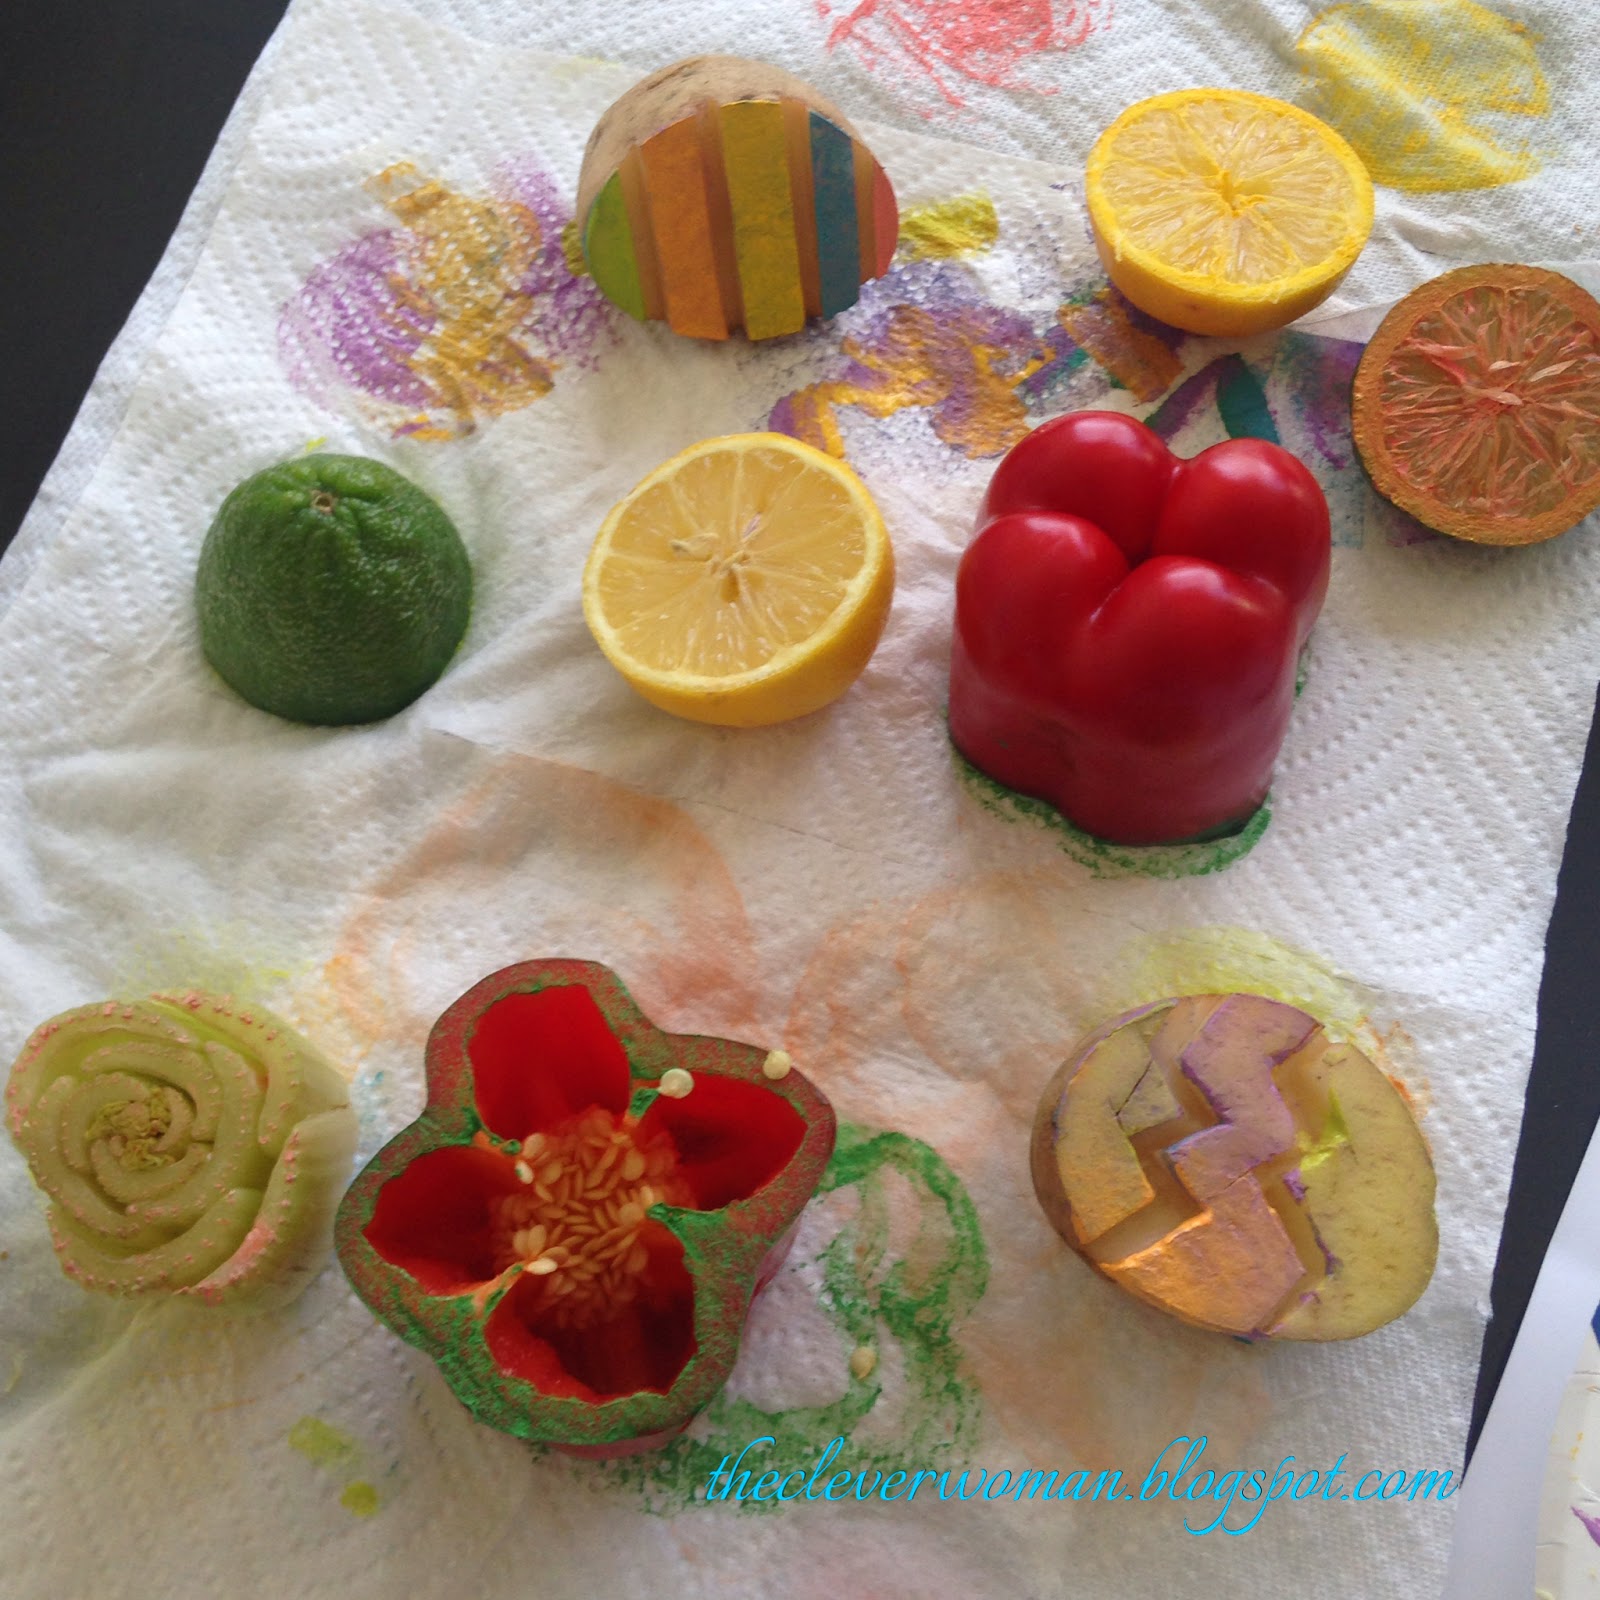
My Clever Girl found these vegetable stamps on Pinterest, of course, and wanted to make them our next project. I've always got veggies & craft paint. Super!  All I had to buy was note cards.  She decided on using:

Potatoes for Easter eggs
Celery stalk-end for a rose
Bell Peppers for shamrocks and flowers
Lemons for summer citrus

We cut the potatoes in half to make Easter-egg shapes, then carved stripes, dots, and zig-zags into them.  This would be an adult's job.  

Everything else we cut in half and rested on a paper towel, cut side down, for 15 minutes to get the edges dry.


We then used craft paints and painted onto the edges of the cut veggies, then stamped them onto cards.  Remember to paint your veggies with a thin coat.  Thick coats blurred the fun details of the veggies and ran into each other on the paper.  We used thin paint brushes and the stick-ends to make dots, add grass, and gold detail to embellish our artwork.
We spent a fun Saturday making hand-made note cards to give to our family and friends.  Nothing says you care like hand-made cards.  Once I committed to getting all the supplies out and facing the aftermath, we invited cousins over and had a crafting party!  

Paper plates and throw-away brushes made clean up a snap.  Except for the table.  I'll be scraping paint of that for a month.  Next time I'll put a vinyl or $1 plastic table-cloth underneath.  I knew better.


Everyone's final products were beautiful, unique, & sure to brighten someone's day!  We have a special project to use our pepper shamrocks that we're really excited about!  

You probably have more items on hand than you realize, so make sure you put them to good use before going out to buy more supplies.  And it's always so much fun to share what you've made to make someone happy!

Happy stamping!


Monday, March 9, 2015

12 Simple Easter Crafts


I'm pretty sure I can handle these.  And if I can, so can you.  I like crafts that I can use multiple times, give, eat, or feel guilt-free throwing away.  Does that cover all the bases?


Bunny Yarn Silouhette from Katie's Crochet Goodies


Felt Bunny Bags from ProbablyActually


Clever Utensil Wrap from Catch My Party


Yarn Easter Egg Garland from Crafty Endeavor


Paper Egg Silhouette by  Minted


Peeps Silouhette Tee by Petit Design Co


Paint Chip Garland from Modern Parents Messy Kids

An easy upcycled Easter garland using paint chips - LOVE the pretty colors and how the lines on the paint chips mimic the lines in plastic Easter eggs.

Pastel Pom Poms from Martha Stewart.  These have been on my to-do list for ever.

msw_spring06_pompom.jpg

Easter Bunny Orange Rolls from Budget Gourmet Mom.  
This food counts as a craft.


Fabric Bunny Gift Bags from Lauri Nana News.  There is no pattern or directions, so I'm putting together a tutorial that I'll post soon!

UPDATE: Here is the tutorial & pattern. Have fun!


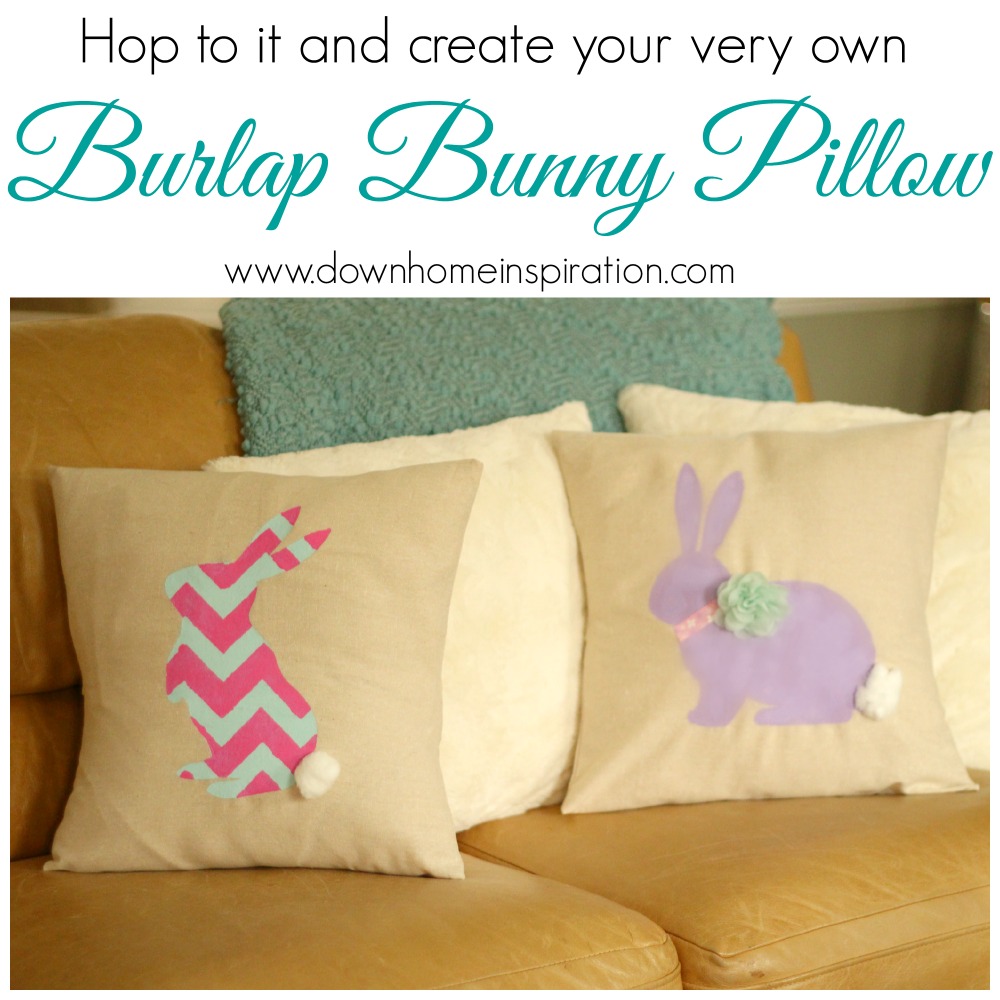
Bunny/Easter Pillow Cases from Down Home Inspiration


Couldn't get a link for this one, but it's pretty self-explanatory.  Would make a super cute card.

Fingerprint Carrot and Bunny Craft


I can't stop myself...Check out more Easter crafts on my Pinterest Easter board.

Here's the results of our first efforts:


My girls love crafts, and they were in heaven when we did the bunny & egg wall hangings.  And my house is so Easter-y!
I got several comments on them from people who came to visit and saw them,
which I made sure they did!

Happy crafting!

Tuesday, February 24, 2015

Darling Flower Headbands - for girls & their dolls!

What 10-year-old doesn't want to have a matching headband with their doll?  Am I right?

Last week, the girls put their craft skills to good use, gathered some friends, and made these cute accessories.  This proves that crafts don't have to be hard, complicated, time consuming, or expensive.  The supplies came from the site Pick-Your-Plum, link here.  You have to stay on your toes to catch a deal here!  Or on Amazon here.

 They used some colorful elastic-by-the-foot, some small hair accessory clips, and a selection of pre-made accent flowers.


They measured the elastic around their dolls' heads, and their own, cut and then glued the elastic into a circle.  After that they attached flowers either by gluing them straight to the elastic, over the joined ends, or to a clip.  That way they can clip the flower to the headbands & swap colors, or clip it directly into their hair.  Genius!  And so easy!


Do you not just love their budding photography skills?


Encourage your inner crafter, your child's budding skills, or make some super cheap and fun gifts!

Don't forget to be clever today!